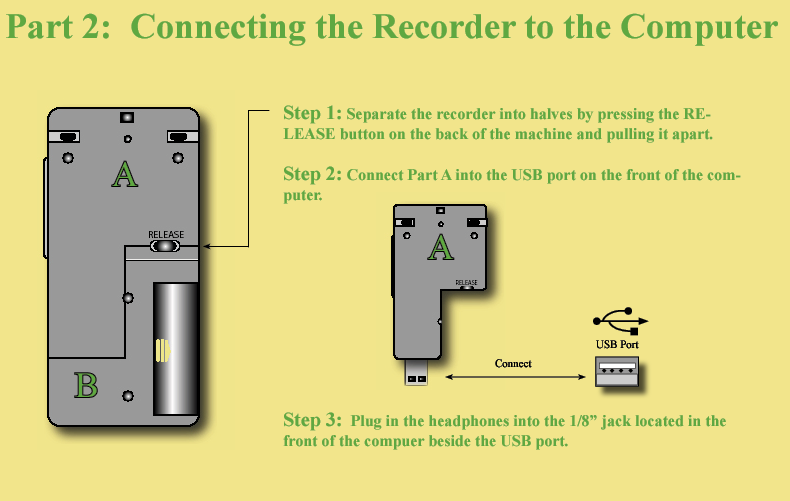
Step 1: After connecting the voice recorder to the USB Drive in the front of the computer, the following screen will appear.
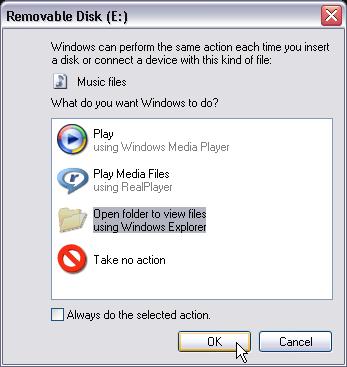
Step 2: Select Open folder to view files using Windows Explorer and click OK.
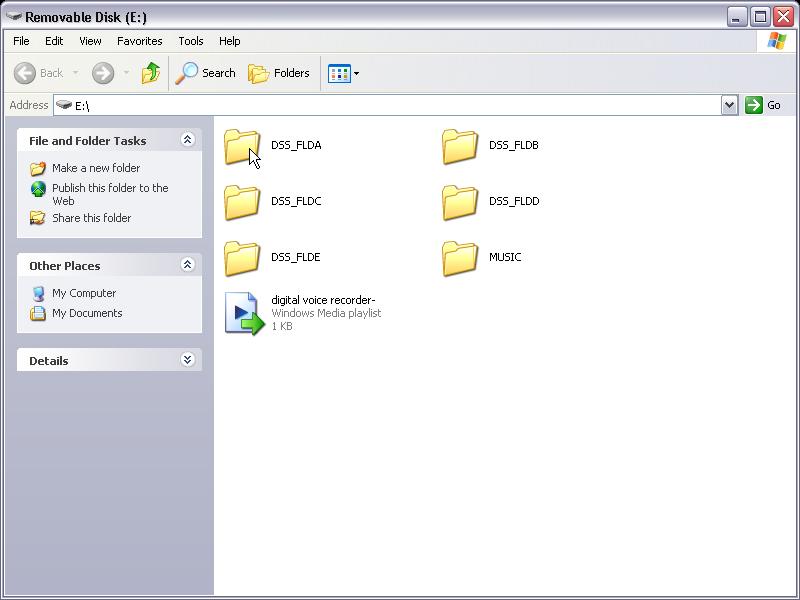
Step 3: Select the DSS_FLDA folder.
Step 4: The Windows Media Player icon will now appear.
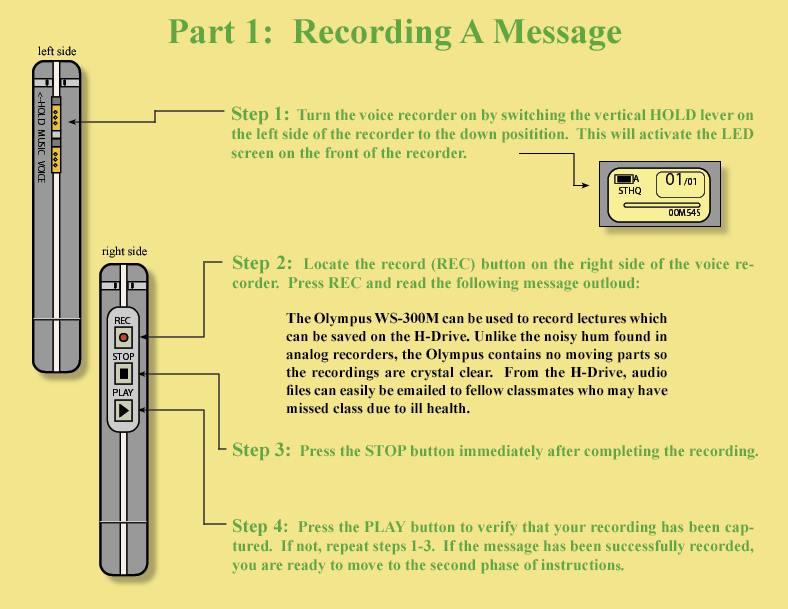
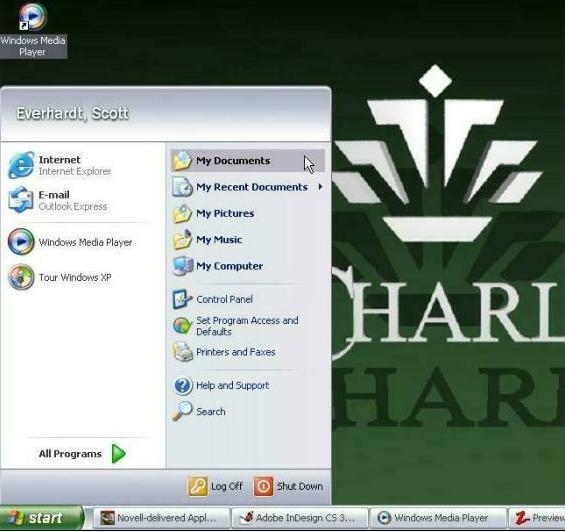
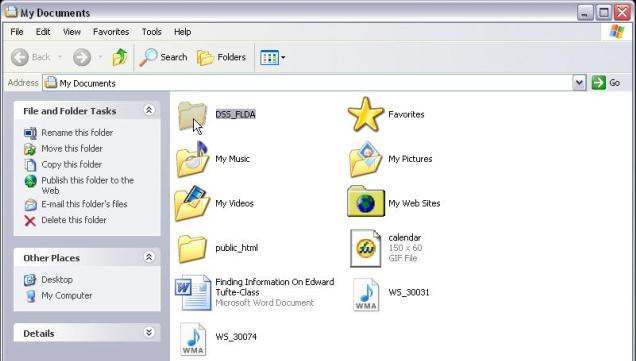
Step 1: Go to the Start menu and click on My Documents.
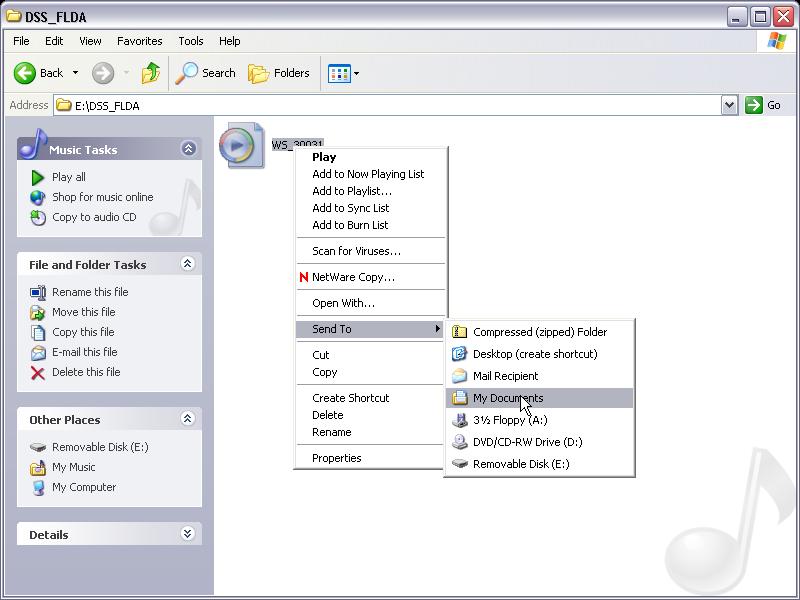
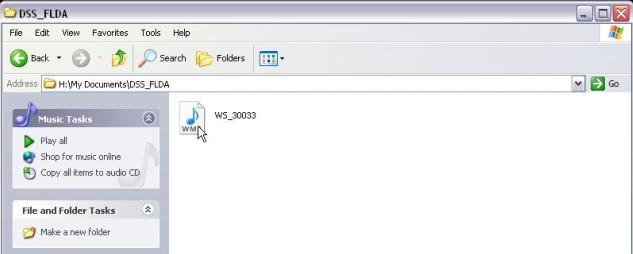
Step 2: Double click on the DSS_FLDA folder.
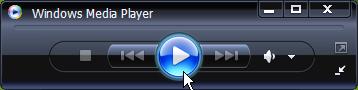
Step 3: Double click on the WMA file.
Step 4: Windows Media Player will now appear. Click PLAY and listen to your voice file.
Step 5: Safely remove the voice recorder from the computer by doing the following:


2. Click on Safely remove USB Mass Storage Device and wait for the confirmation box to appear.
3. Remove the voice recorder from the USB port and reconnect Parts A & B (refer to part 1).
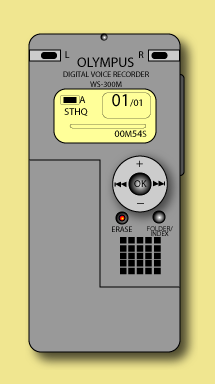
1. Following the instructions in a timely manner was:
Very Easy
Easy
Neither Easy Nor Difficult
Difficult
Very Difficult
2. Understanding the graphics and illustrations was:
Very Easy
Easy
Neither Easy Nor Difficult
Difficult
Very Difficult
3. With regards to how the information was presented, I found working through
it to be:
Very Easy
Easy
Neither Easy Nor Difficult
Difficult
Very Difficult
4. I found the subject matter covered in this tutorial to be:
Very Easy
Easy
Neither Easy Nor Difficult
Difficult
Very Difficult
5. Performing this operation a second time without the directions would
be:
Very Easy
Easy
Neither Easy Nor Difficult
Difficult
Very Difficult