|
Photoshop Logo Tutorial
Fancy Logo Requirement
Check out the logo I made for my kitties! It looks just like a fireball, huh? You can make one just like it, and I'm going to show you how.
Remember, I provide these brief tutorials to just get you started. Exploring is your job. Follow along or work at your own pace, but please, please, please try not to disturb others who are working.
Making a Glossy, Floating Fancy Logo using Photoshop
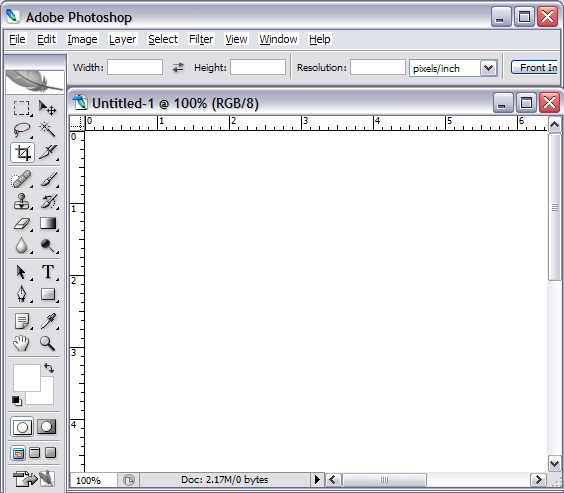
- Open up a new Photoshop file. It doesn't matter the size, but make sure you're working at 100%.
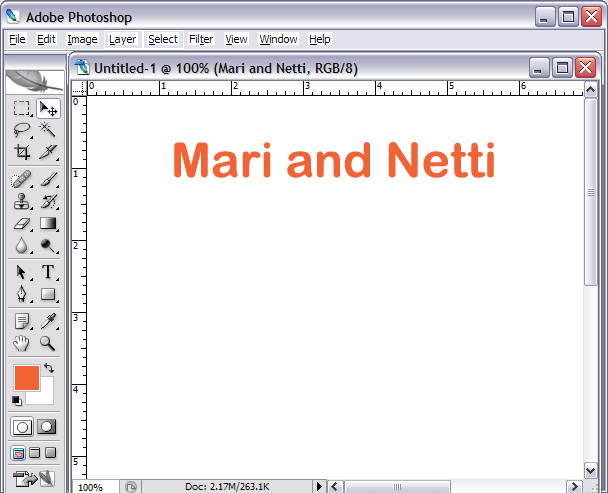
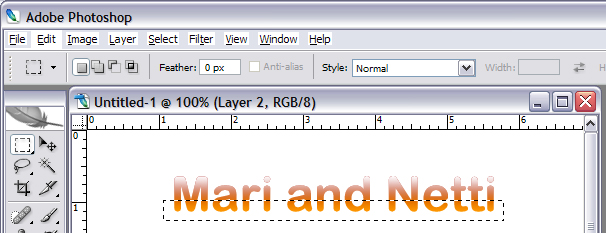
- Select the text box tool, drag out a text box, and type your the text you want:
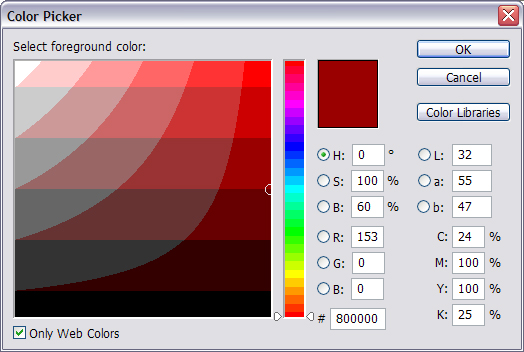
- To change your font color, double click the "Set Forground Color" square.
Click the "Only Web Colors" box (because this is going online).
Visit this helpful color picking site to select an exact color (if you'd like).
I chose #800000 (maroon).
- Double click the "Set Background Color" and choose a lighter color.
I chose #FF8000 (orange).
The color boxes should look like this below:

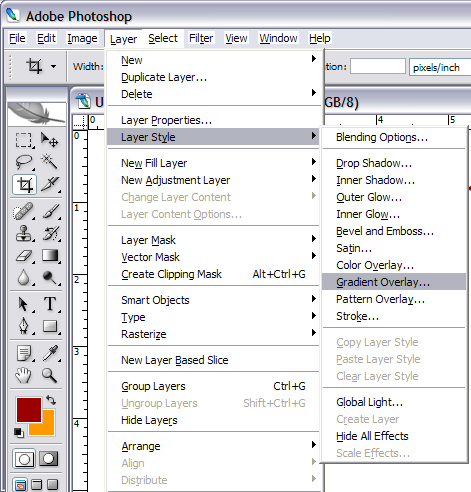
- Click Layer --> Layer Style --> Gradient Overlay
- Set Angle circle to "-90".
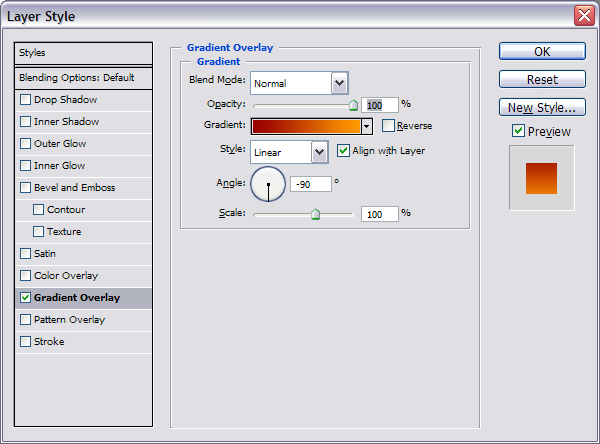
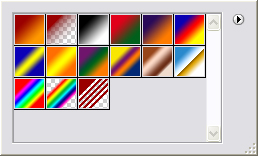
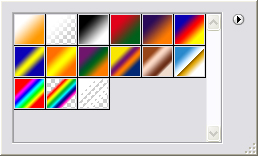
- Click the "Gradient" down arrow, and select the first design.
- Hold down [Ctrl] and click the first layer:
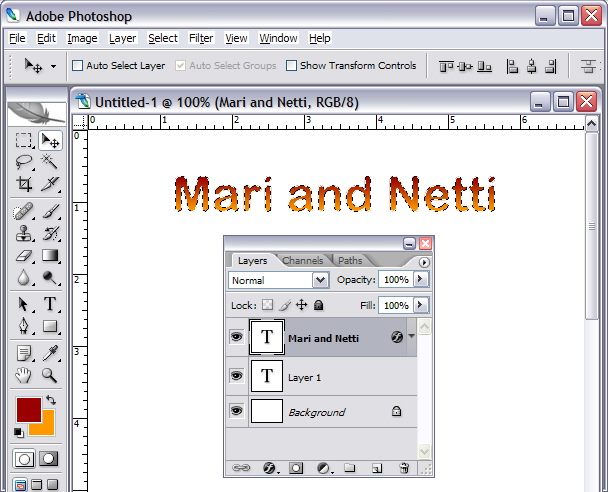
- Create a new layer by clicking the "Create a new layer" icon (the peeled back page).
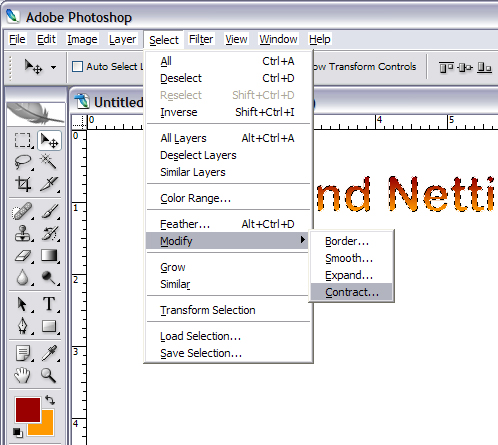
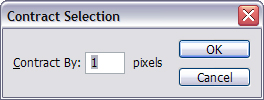
- Click Select --> Modify --> Contract.
- While this new Layer is selected, change the "Set Foreground Color" to white (#FFFFFF).
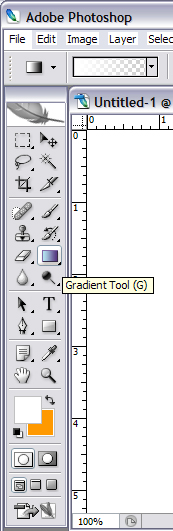
- Click the Gradient box at the top and select the second style.
- This is the tricky part, so please pay attention.
Place your cursor in the middle of your text on the top of the text.
Click and drag down about half to three-quarters of the way through your text.
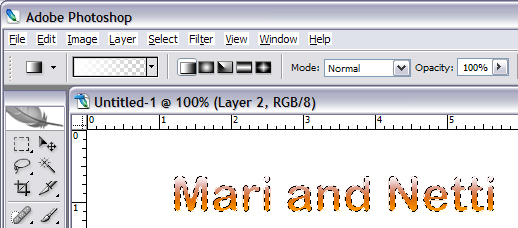
Your text should look similar to the image below.
- Select the Rectangle Marquee Tool (first one--dotted-line square).
Make a box around the bottom half of your text.
Click [Ctrl] + 'D'.
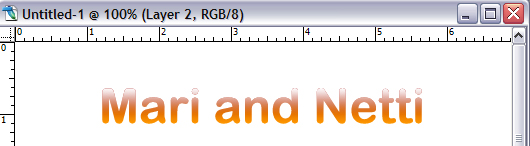
- Your image should look like the one below.
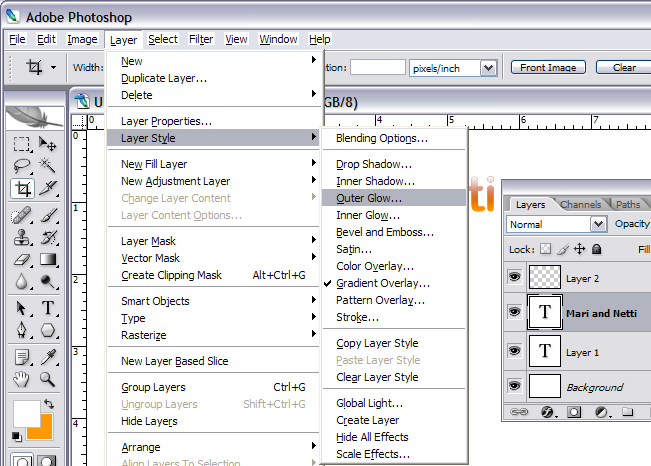
- Click on original 'T'-text layer.
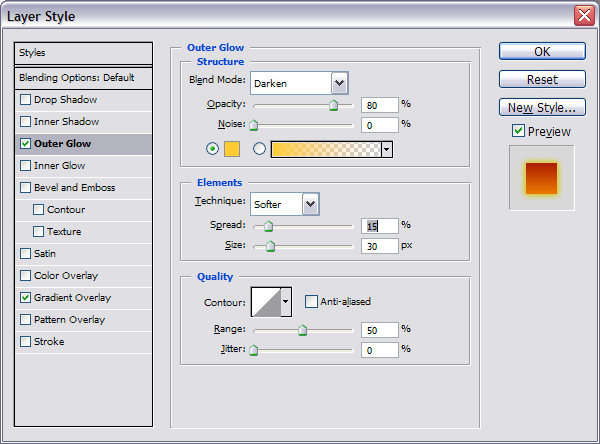
Click Layer --> Layer Style --> Outer Glow.
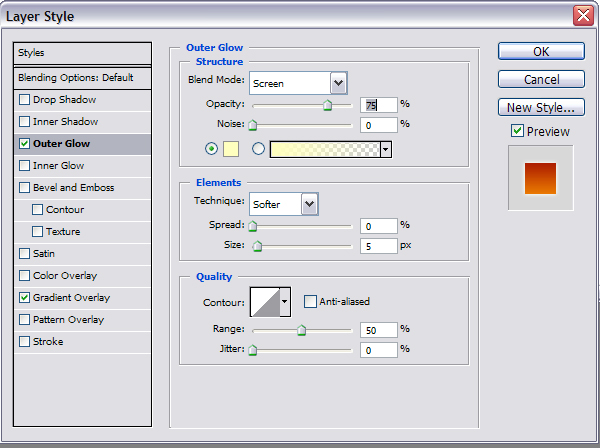
- Set "Color of Glow" to a color of your choice.
I chose # ffcc33 (yellowish-orange).

- Change "Blend Mode" to Darken.

- Change "Opacity" to 80%.
Change Size to 30 px.
Change Spread to 15%.
- Duplicate the Text Layer. Right click the layer, then click "Duplicate Layer."
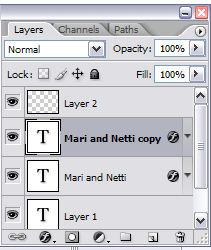
- Click "Outer Glow" on the new layer. Change to white (#FFFFFF).
Change "Blended Mode" to Lighten.
Change "Opacity" to 100%.
Change Size to 5 px.
Change Spread to between 25 and 75%. (or whatever you like)
- Click "Outer Glow" on the old layer.
Adjust size and Spread accordingly.
Your image should look something like this:

- Save as a .jpg and put it on your website somewhere.
Now, start working on your Business Card and Letterhead. These documents should reflect the same company (which you should make up).
|