| |
GeoDesign
Tutorial 3 - Vector Analysis
Tutorials 2-4 are three parts of one large task. In these three exercises you will use queries, theme modification, overlay functions and some raster analysis to select a site for a new fire station.
In Tutorial 2, you used visual inspection to qualitatively evaluate potential sites for the new fire station. Now, in Tutorial 3, you will use a more methodical approach, using overlay functions to explicitly identify the locations that meet the criteria. Remember, the criteria for a suitable site are:
- Parcels must be vacant.
- Zoning must be for some type of commercial use.
- The site cannot be covered by water.
- The site cannot be covered by parkland.
Open ArcMap, Once ArcMap has opened, open the map document that you worked previously in Tutorial 2.
A. OVERLAY FEATURES
We start by creating a flowchart showing the datasets and operations
we intend to perform:
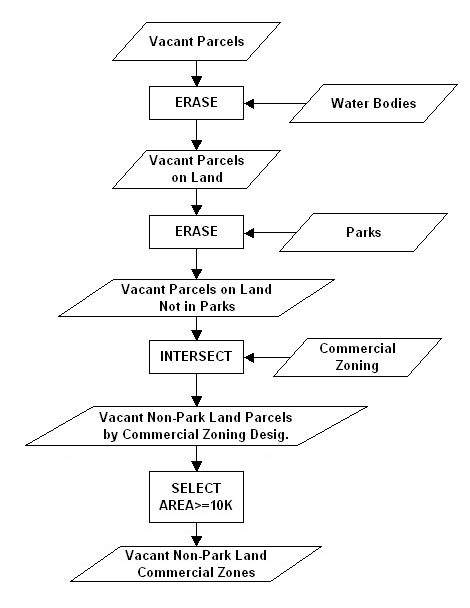
In the first stage of this flowchart, you will perform an ERASE operation on the vacantparcels layer to eliminate from
consideration all areas that fall within lands. The ERASE operation takes the full extent of one layer (in this case the waterbody layer, you will have to create this layer from
ShoreLine layer later) and uses it to erase parts of another layer. This
means that all waterbody polygons, regardless
of their attributes, will be used as erasers of the vacantparcels polygons.
- To have a layer only contains waterbody, click Selection menu then Select by Attributes , In the dialog window
set your query as shown below
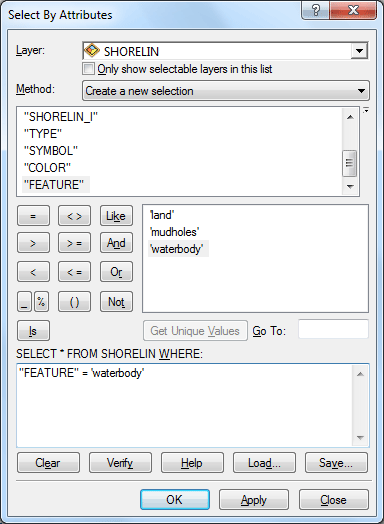
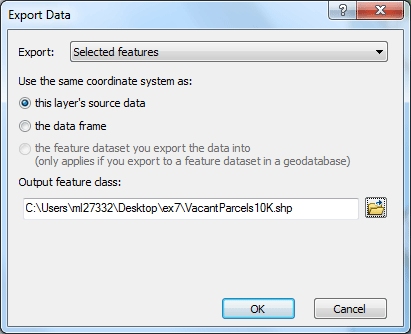
Then right-click on the SHORELINE layer's name and
choose Data > Export Data to create a WATERBODY layer that only has all the waterbody. Then clear selected features by going to Select menu
> Clear Selected Features
- Open ArcToolbox .
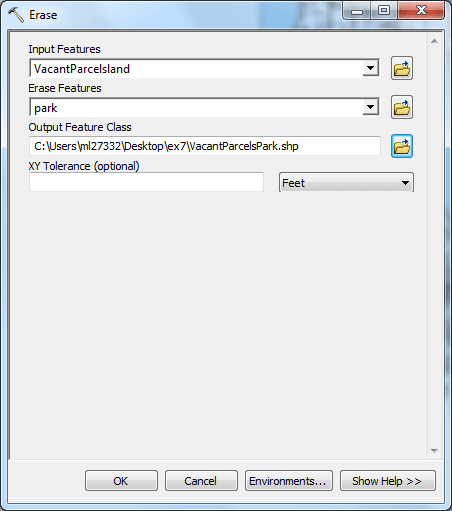
- Find the tool Analysis Tools > Overlay > Erase and double-click it.
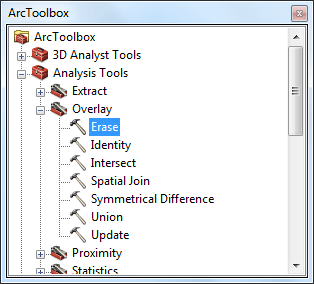
- You will see the following dialog box:
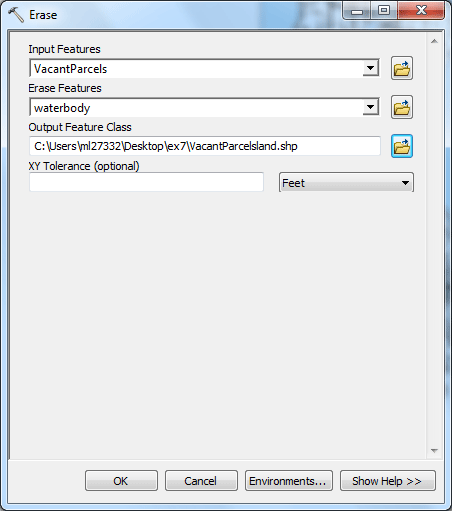
Enter the Input Features and the Erase Features as shown above , leave the XY tolerance empty,
and give your Output Feature class a name (e.g. vaclandparc).
Make sure to place this new Feature layer within your own
subdirectory,
- Click OK to perform the ERASE.
- Next, perform another ERASE operation, this time
starting with the water-less parcel layer you just created in the step 4 (as
the Input features) and using the parks layer as the Erase Features . Use Steps 2-5 above as
a guide.
- After finishing your second ERASE operation, you should have a layer
that represents all of the vacant parcels that are not in water and
not in parks. You will now intersect that layer with
the Commercial Zoning (CommZonesDissolved) Layer. This will
produce a new geography that combines the boundaries of both input Layers
but includes only areas that are shared by both Layers.
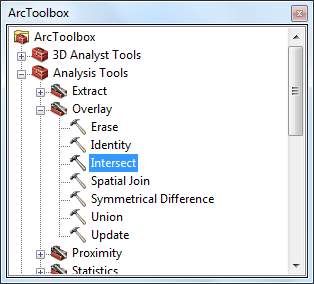
- In ArcToolbox, find and double-click on the tool Analysis Tools > Overlay > Intersect.
- You will see the dialog box shown below:
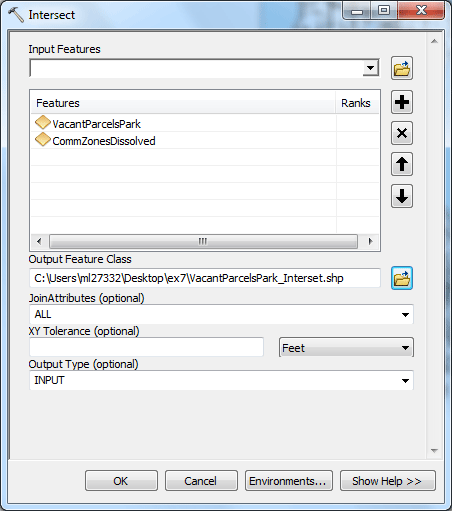
Under Input Features, enter the layer you produced
in Step 6 after your second ERASE operation and the CommZonesDissolved layer
from Part 1. give your Output Feature Class a name,
and set ALL for Join attributes.
- Click OK to begin the INTERSECT operation.
- You have now created a polygon layer that represents every discrete
area in Seattle that has a unique parcel identity, a unique zoning designation,
and meets the conditions of not being in water and not being in a park..
B. SELECTING SITES BY SIZE
- The last step in selecting a location is to be sure the site is large
enough to accommodate a fire station. The data you are using is in feet.
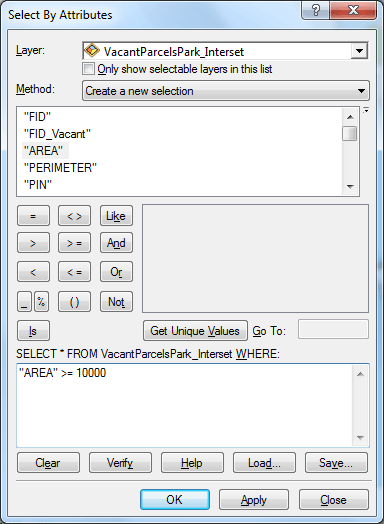
Let's assume we need a site that has at least 10,000 square feet of
area. Query the layer you just created to find all parcels whose AREA is greater than or equal to 10000, then export those parcels to one
last layer. You may need to refer back to the instructions for Part
1 to get started (something about "Select by Attributes").
- Be sure to clear selected features. Set the symbology of your final layer to something rather noticeable
at a city-wide scale.
Save your project file in your project directory. You will need it to continue working on your next assignment.
The Next Step:
Save your project file in your project directory.
In Tutorial 4, you will conclude this process by using some raster calculations to prioritize the suitable locations, thereby finding the best location.
prepared by Ming-Chun Lee, 09/17/2014
|