Home |
 |
GeoDesign Tutorial 11 - Geocoding (mapping addresses) Objectives:
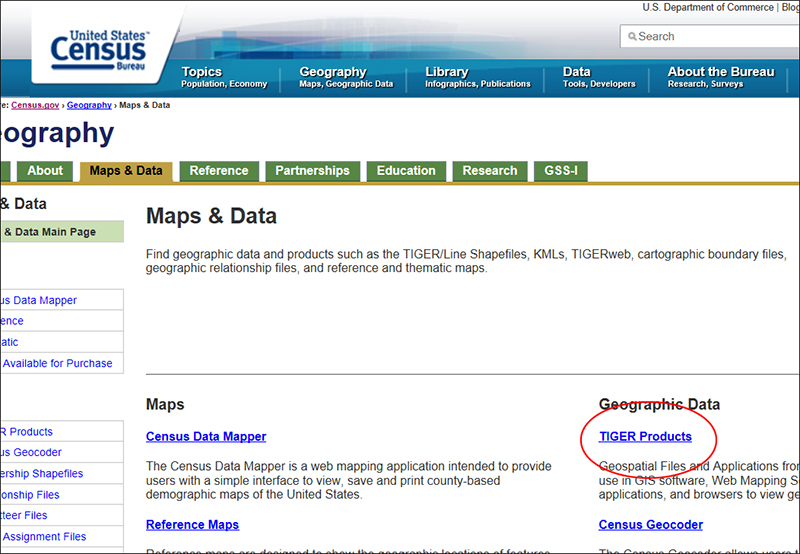
Reference: Geocoding Tutorial, ESRI 2010, (esri.com accessed 03/29/2011) SetupData can be found within a zip file, which can be downloaded here. Extract the file into your personal space. When you extract this zip file you should notice it has only one Excel file: elgin_org_ad.xlsx. It contains addresses for some of the community-based organizations in Elgin (not a complete list, only for practicing purpose). Setting up an Address Locator (this part of tutorial has been covered previously in the Geo-referencing tutorial)An address locator lets you convert textual descriptions of locations into geographic features. Address locators are stored and managed in a workspace you choose. The workspace can be a file folder, file geodatabase, personal geodatabase. US Census Bureau provide a lot of useful GIS data on their website: http://www.census.gov/. For this exercise, we will download a street layer and use it to create an address locator for address mapping (geocoding). Go to www.census.gov. On the main page, roll the cursor over Geography, then click Maps & Data.
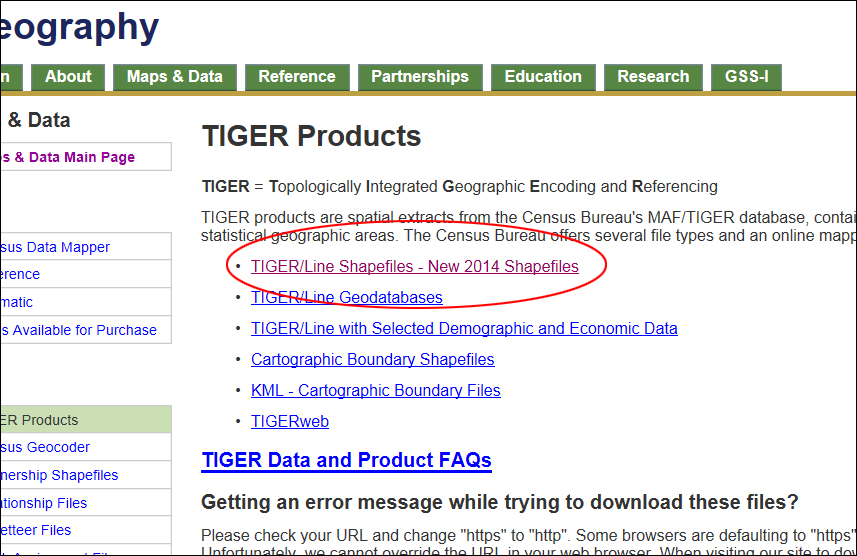
On the next page, click TIGER Products, which is the gateway to the most current census shapefiles. Then on the next page, click TIGER/Line Shapefiles.
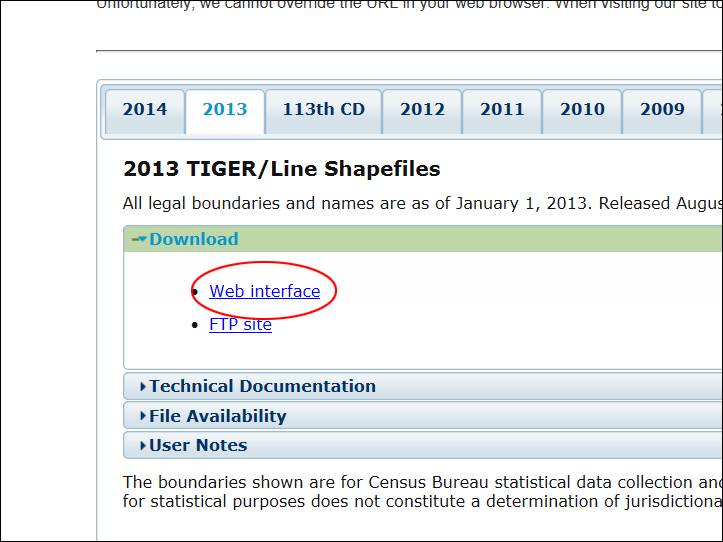
On the next page, you have options to download Line Shapefiles for different years, for Census 2010, you will have to choose the year of 2010; likewise, for Census 2000, you choose the year of 2000. For this exercise, we will go with the year of 2013, make sure the tab 2013 is highlighted, then click Downlaod. Then click Web Interface.
In the Select a layer type drop-down menu, choose Features > All lines, then click Submit. Note: This file primarily contains all the streets in an area. However, also include other linear edges such as waterbodies, railroads, and trolleys. For geocoding and network analysis, All lines is the one you will have to choose.
Then select Texas and Bastrop County, click Download to get the zip file. Open it and extract the files into your personal space. Now please open ArcCatalog. Make a connection to the folder that contains both the image file and the line shapefile. Once you connect to the folder, right-click on the folder name, select New > Address Locator...
In the dialog window, in the first field "Address Locator Style," click the Browse Folder icon
A warning message will show up at the top in yellow, ignore it, we will fix that later in the next few steps.
In the next field "Reference Data" click the Browse Folder icon and navigate to your folder and select the shapefile you got from census.gov: tl_2010_48021_edges.shp. Here you will see another red circle indicating another error, don't worry, you will fix this too in the next step. Scroll down to find the Field Map, in the field named "Alias Name," find the field "Street Name," now it shows "<None>" you have to click <None> and change it to FULLNAME.
Now the error message should disappear. Scroll down to the last field "Output Address Locator" on the bottom of the dialog window, click the Browse Folder icon and make sure you are still in your folder. Give it the name my_locator. Your address locator settings should look like the screenshot below. Click OK to set the locator.
It may take a few seconds to process the address locator. Once it is done, you should see a little red house icon Now you can close ArcCatalog. Then go ahead to open ArcMap.
Geocoding addresses in a tableAdd the shapefile tl_2010_48021_edges.shp to your map content. Zoom in to find City of Elgin roughly on the top of the map.
Use the Add Data button to add the Excel file elgin_org_ad.xlsx. Browse to your folder, then double-click the Excel file and add the worksheet Sheet1$ in the map.
You should see both files should appear in the table of contents. Right-click the Excel file in the table of contents and select Open, review the addresses that you are going to geocode. There should be 15 records in the table. Close the table.
Right-click the Excel file in the table of contents again, select Geocode Addresses.
Click Add in the Choose an address locator to use dialog box. The Add Address Locator dialog box opens.
Navigate to your folder, click the My_Locator locator, then click Add. Click OK. The Geocode Addresses: My_Locator dialog box appears. In the Output section, click the Browse button to define the output shapefile in your folder. You can use the default name: Geocoding_Result.shp. A new point shapefile named Geocoding_Result will be created in your folder. The point features will be generated by the geocoding process.
Click the Geocodig Options... button. In the dialog, change the Minimum Match Score from 85 to 75. Click OK to close the dialog.
Click OK to start geocoding. The geocoder will geocode your addresses. The Geocoding Addresses dialog box is then displayed showing the matching statistics and the progress bar for the matching process. When the geocoding process is finished, the Geocoding Addresses dialog box shows the final statistics of the addresses that were matched or not matched. You have got a perfect 100% match.
In the case that some addresses fail to match or some are tied, you can rematch the unmatched addresses by clicking Rematch button in the Geocoding Addresses dialog. Click Close to close the Geocoding Addresses dialog box. Let us use a green flag symbol for the new point features and turn on Lable Features for the streets (right-click tl_2010_48021_edges.shp layer, and select Lable Features). Zoom in to better view all the points.
You can also open the attribute table for the Geocoding Result layer.
A number of new fields have been added. The Score field tells how good each of the matches is, non of them are very high, but usually a score around 80 works just fine. You can check the Match_addr field, which is the matched address the My_Locator identified from the geocoding process. Compare those with the ARC_Street field, which contains the original addresses listed in the Excel file. Results are actually pretty accurate.
The deliverable: No assignment is due.
prepared by Ming-Chun Lee, 10/09/2014
|