Home
GeoDesign
Tutorial 13 - SketchUp and Google Earth
For detailed instructions for SketchUp tools, please refer to SketchUp user guides, which can be accessed here.
Again, Video Tutorials is perhaps the best way to learn SketchUp, You
can view them directly through the Help Menu: Menu Access:
( Help > View Tutorials ). Your computer will try
to go online and access streaming versions of the tutorials from the SketchUp
web site.
Or you can go directly to the webpage listed below to access those Video
Tutorials:
http://sketchup.google.com/training/videos.html
Some Tips for Modeling in SketchUp
SketchUp Geometry
The key to SketchUp modeling lies in the geometric topology of the two basic drawing elements: lines and faces. For all SketchUp models, lines form the basis of geometry as they connect together in 3D to provide a framework for faces, which are in turn attached to those lines. Faces depend on the lines that define their edges, so that deleting an edge also deletes any faces that use that edge to define their boundary. However, deleting a single face does not delete any of the edges that define it.
Lines
You may notice that there are two types of lines used in a SketchUp model: thick and thin lines. Thin lines are used when all the faces attached directly to those lines are truly geometrically inter-connected. If not, then thick lines will be used.
Layers
Layers in SketchUp work very differently from most CAD packages. In other software, layers provide complete separation for objects within them. Unfortunately, this approach does NOT work well with SketchUp, where geometries that depend on each other are fundamentally inter-connected. In SketchUp, elements on different layers may remain fully connected with one another if they all are part of a geometric entity.
Groups
In SketchUp, a 3D object is not truly an entity; instead, it is composed of a number of lines and faces. However, you can use Make Group to group together all the lines and faces that belong to an object to form a single entity. Groups are very useful for combining entities to perform a quick operation such as copy or move. Another advantage is that elements within a group become isolated from elements outside it so that they cannot be directly altered.
Note:
If you begin creating complicated geometry in SketchUp without understanding
how to use Groups and Layers, you and
SketchUp will become very confused about where your objects are, and they
will become very difficult to manage and draw. If you don't want the geometry
you are editing to become part of the other things that may be adjacent,
it is important to make sure that these things are in different layers
or groups. If your model is well ordered into groups and layers you can
always add detail at any stage without getting in a tangle with other
parts of the model.
Editing Groups
You can edit a group without un-grouping (explode) it, simply double click on it with the Select Tool or select it and then go to Edit > Group > Edit Group. This will place you within the objects context, and allow you to edit it directly. Once you are finished, you can use the Select Tool to click outside the context to terminate the editing.
Inference and Mouse Control
SketchUp always tries to figure out what is underneath your mouse, and what axis you are moving along and provides you with inference information. You control where your editing goes by controlling what is behind your cursor and by changing the orientation of your view. The precision of the inference in SketchUp is a matter of how closely you are zoomed in. It is important to learn how to change your zoom focus and orientation of your view while you are editing. This is a matter of learning how to use the Scroll Wheel on your mouse to control the Zoom, Orbit, and Pan of your view.
Selection Expanding
You can automatically expand selection operations on elements by clicking the Select Tool multiple times in rapid succession. For example, clicking twice on a face will select that face as well as all connected edges. Clicking three times will select that face as well as all geometry physically connected to that face.
While in the Select Tool, you may also use a right-click to bring up a context menu. From there, you can use the Select submenu to expand the selection by Bounding Edges, Connected Faces, All Connected, All on Same Layer, and All with Same Material.
Moving Geometry
An easier way to move an entity is to follow the steps listed below:
1. First, use the Select Tool to specify which elements
or objects, or group, are to be moved.
2. Activate the Move Tool.
3. Click once to select the start point (your base point) of the move
operation. As you move the mouse, an inference line will appear between
the start and ending points of the move, and the distance of the move
is displayed in the Value Control Box. You can also type in a specific
distance in the VCB.
4. Click on the destination point to finish your move operation.
Note: Inference Locking During Move
Before or during a Move Tool operation, you can lock
an inference by holding down the Shift key. This keeps
the inference from being distracted by other geometry in your model.
Making Copies
1. First, use the Select Tool to specify the entities
to be copied.
2. Activate the Move Tool.
3. Before you start the move operation, hold down the Ctrl
key on your keyboard. This tells SketchUp that you wish to move a duplicate
of the selected entities instead of the entities themselves.
4. After the operation is finished, notice that the newly copied geometry
is now selected, and that the original geometry is de-selected. You may
continue copying by the same method.
Use Value Control Box (VCB)
While moving, or performing other operations, the VCB (Value Control Box) at the bottom right corner of the SketchUp window displays the length of the displacement in the default units specified under the units tab of Preferences. You may specify an exact displacement while performing a certain operation. To specify a new displacement length, type it in the VCB and press Enter. You may do this either during or following the operation.
Components
Components are pre-built entities that you can repeatedly use in your
model, such as windows, doors, furniture, vegetations, or even human figures.
Using components is a great way to make your model look realistic.
SketchUp contains a sampler of a few of the over 3000 pre-created components
available on the SketchUp web site. You can retrieve additional components
from the SketchUp web site by clicking The Get More button,
which can be accessed by going to Component Library Browser,
then Click on the right arrow next to the component library
list to open the details pop-up menu. Or you can directly go to sketchup.com,
and then click on Downloads.
Working With Google Earth
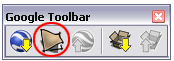
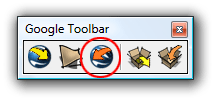
Fist off, open Google SketchUp, make sure you have Google toolbar ready in your workplace.
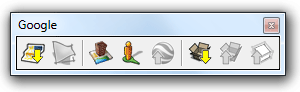
Click Add Location... ![]() button in the toolbar. This will turn on the Add Location dialog window, which is actually a simpler version of Google Earth.
button in the toolbar. This will turn on the Add Location dialog window, which is actually a simpler version of Google Earth.
In the Search box, type in "University of Washington". Click on Search button. Google Earth should then fly to the UW campus.
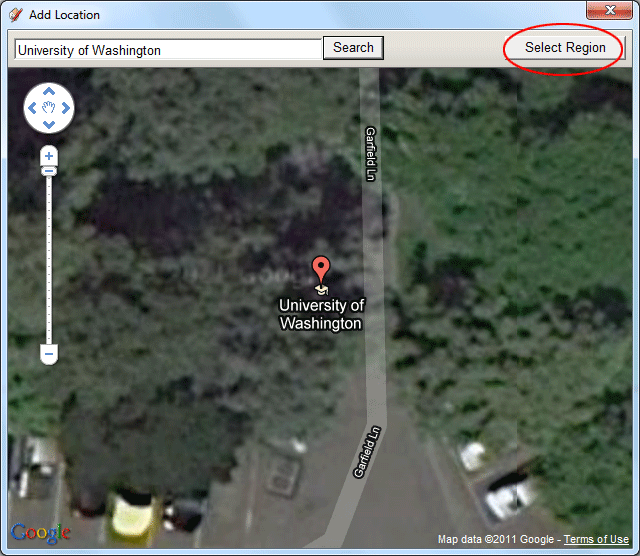
Use the middle wheel button on the Mouse and zoom in to the area that
contains all the buildings that you are going to work with, click and drag to the desired area. The view should
be looking straight down from the sky, no perspective angle .
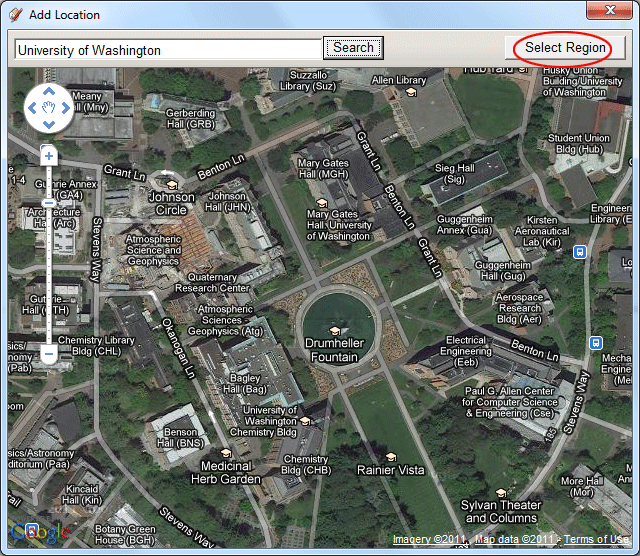
Click Select Region button in the dialog window. Then decide the area you want to cover and move the blue pins to set the boundary. Click Grab button when you are done deciding the extent.
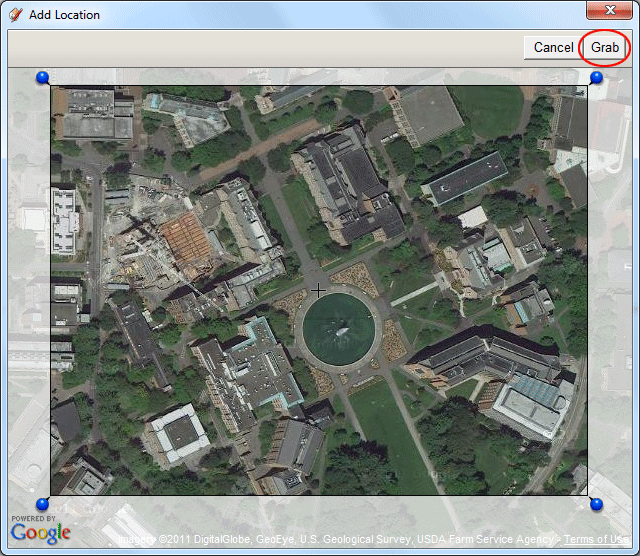
Give SketchUp a little time to process, then you should see that a 2D flat UW campus snapshot is placed in your model.
A few things to look at:
1. you can turn the image into a 3D terrain by clicking the "Toggle
Terrain" button in the Google Toolbar. If clicking again,
it will switch back to 2D flat view.
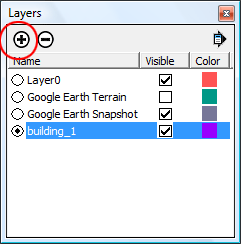
2. Turn the Layers palette on, you will discover that two layers have
been added, one contains 2D flat snapshot, one has the 3D Terrain.
3. Both two layers are locked, cannot be edited, unless you unlock both,
but I think you better keep them locked.
Then you can begin to build you model. You can create a new layer by clicking Add Layer button in the Layer Palette, name your new layer "building_1", make this layer the active layer, then build your model on this layer. (always pay attention to layers, be aware which layer you are working on at any moment)
If you have switched to 3D terrain, please now switch back to 2D flat snapshot.
Adjust Axes
Because almost all the buildings on UW campus are not aligned perfectly with the three axes in SketchUp, you will have to adjust axes and make three axes all parallel to the three sides of the building that you are about to create.
AGAIN !!! If you have switched to 3D terrain, please now switch back to 2D flat snapshot.
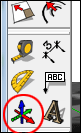
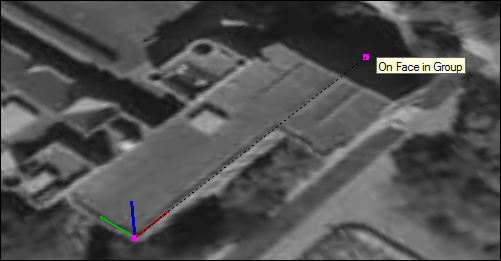
Click on Axes tool in the Construction
toolbar, you will see the mouse cursor change. Place the cursor to one
of the corners of your building, make sure that it says "On
Face in Group", click the mouse to locate the origin of
the new three axes.
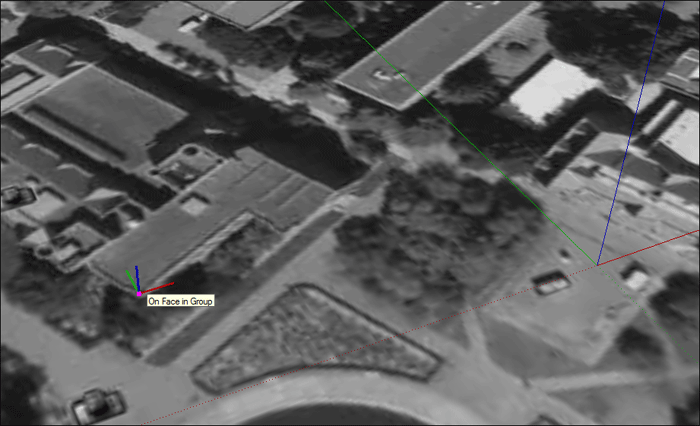
Then align the "Red Axe" with one side of the building, move the mouse (no click yet) to align the dashed line with one side of the building, then click to position the red axe.
then align "Green Axe" with another side of the building. The same process again. Align the dashed line with another side of the building, then click to position the green axe.
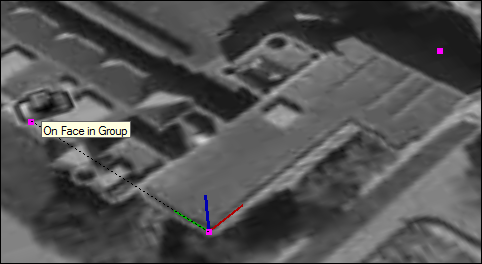
You then should be able to see that the three axes have been aligned with your building.
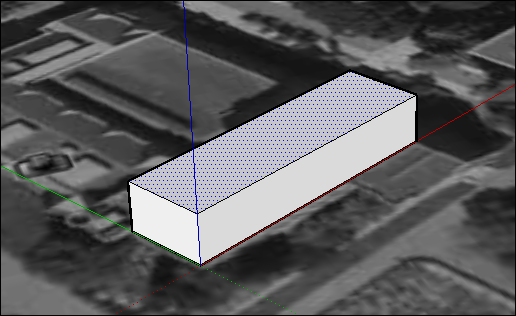
You can now you Rectangle tool to make a rectangle to
cover part of your building,

then use Push/Pull to make it a 3D box, from this point, you are free to try some of the tools to add details in your building.
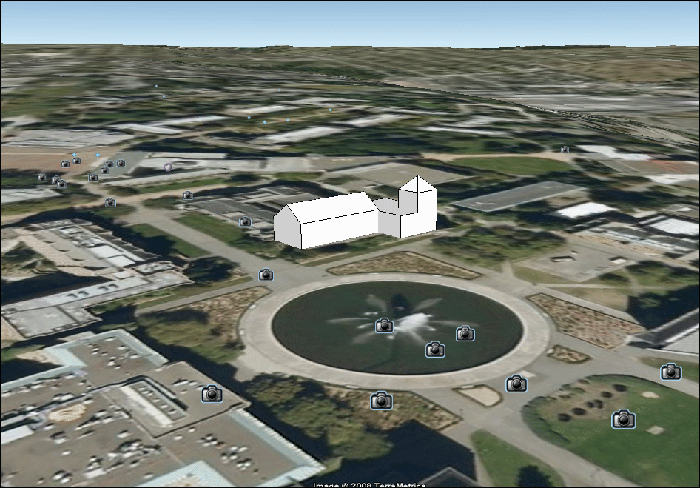
When you are done with all the modeling, you can now put your model back into Google Earth. Click on Place Model tool in the Google Toolbar,
again, wait for a few seconds, Google Earth will open and fly to the UW campus, and you should be able to see your building sitting on the exact location on the campus. And it is in 3D.
I suggest you build ONE building at a time, and use only ONE layer to build this building. By doing this way, you do not have to GROUP your model, so you do not have to worry about forgetting to use Edit Group. If you still prefer grouping your building, just remember to use Edit Group whenever you want to modify your building.
prepared by Ming-Chun Lee, 10/10/2014