HomeExercises |
 |
ARCH4050 / ARCH6050 / MUDD6050 Tutorial 13 - ModelBuilder Objectives:
Reference: ModelBuilder - Executing Tools Tutorial, ESRI 2010, (esri.com accessed 03/07/2011) Load data into an ArcMap documentData can be found in the zip file by clicking HERE. Create a new folder on the Desktop. Name the folder model, extract the following file geodatabase here in the folder. Files:
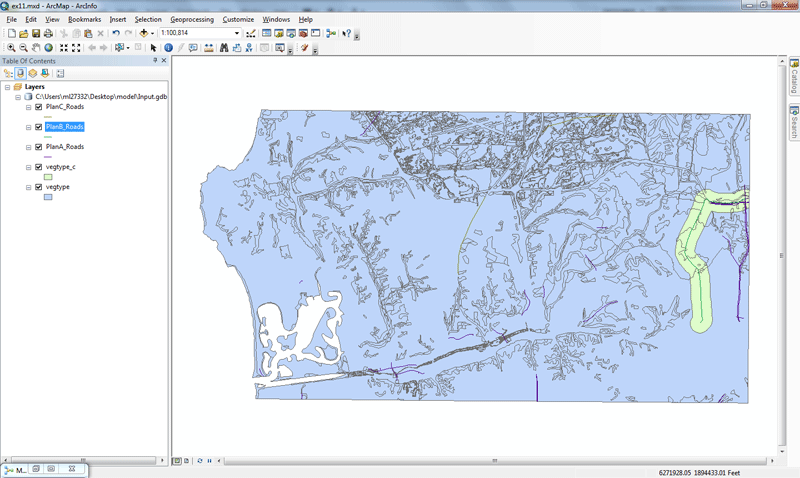
Open ArcMap. Create a new blank ArcMap document. Add all the four feature classes from the geodatabase Input to the map document. Creating a new modelClick the ModelBuilder button on the ArcMap Standard toolbar.
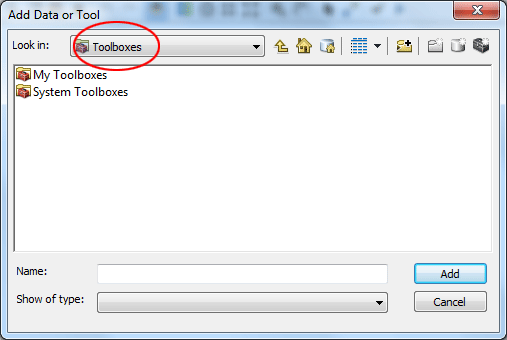
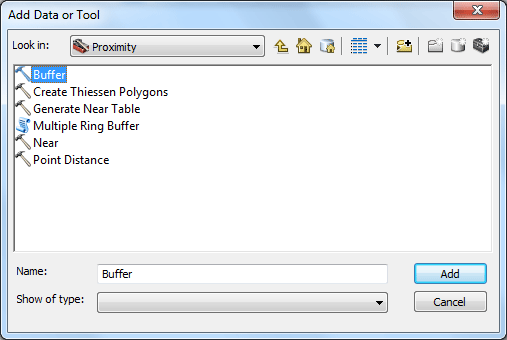
The ModelBuilder window is now open for editing. We are going to first add the tool Buffer into the model. In the ModelBuilder dialog, click the Add Data or Tool button
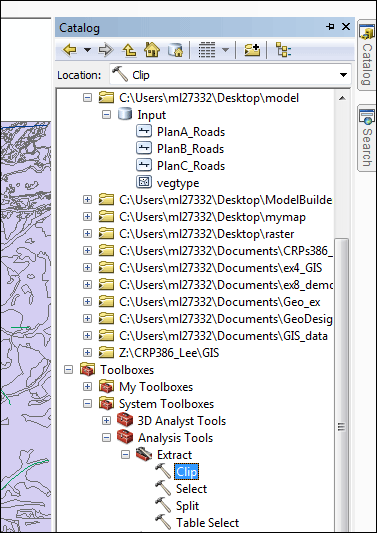
Now add another tool Clip in the model. This time, go to the Catalog window, navigate to Toolboxes > System Toolboxes > Analysis Tools > Extract. Then select Clip and drag the tool onto the ModelBuilder canvas in any white space.
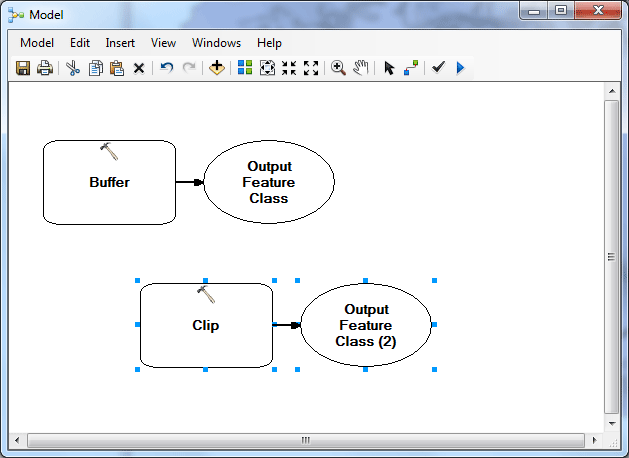
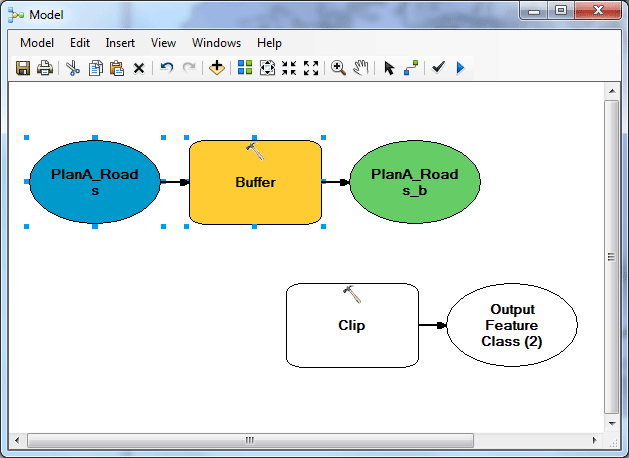
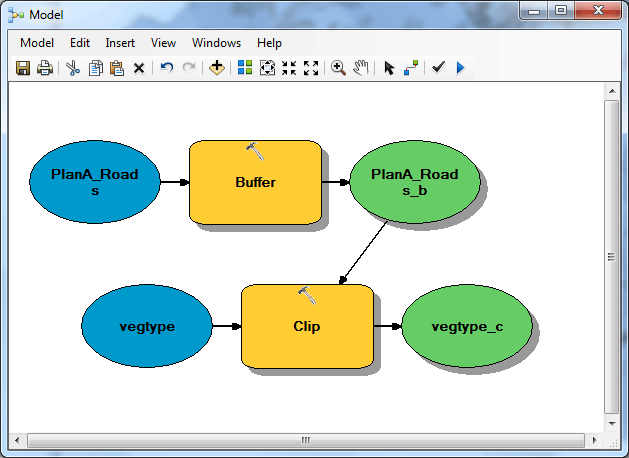
You now have two tools in the model.
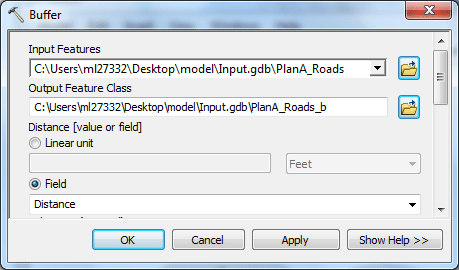
Filling in tool parametersNow you can fill in the tool parameters. Double-click the Buffer tool to open its tool dialog box. For the Input Features, browse to find PlanA_Roads feature class in the Input geodatabase. Name your output feature class PlanA_Roads_b. Be sure to save it in the Input geodatabase. For the Distance , choose the Field option and choose Distance from the drop-down list. Click OK.
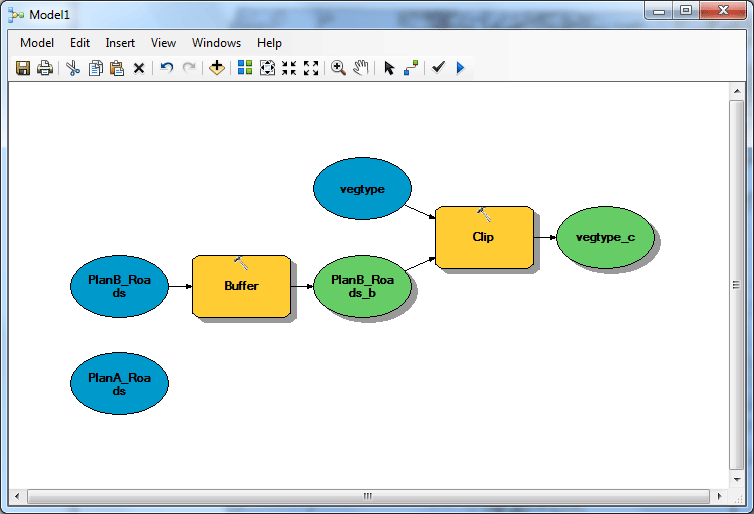
The input data is added as a variable to the model (the blue oval) and is automatically connected to the Buffer tool.
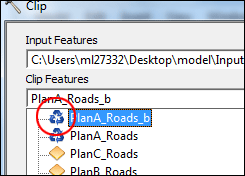
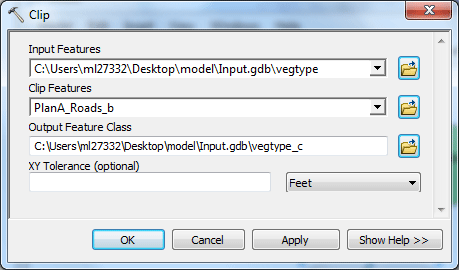
Now double-click Clip tool to open its tool dialog box. For the Input Features parameter, navigate to the Input geodatabase, choose vegtype feature class. For the Clip Feature parameter, click the arrow and choose PlanA_Roads_b from the drop down list. The blue recycle symbol means that PlanA_Roads_b is a variable in the model, which was created when setting up the Buffer tool in the previous step.
Name your output feature class vegtype_c. Be sure to save it in the Input geodatabase. Click OK
Now you can see that the output feature class of the Buffer tool is automatically connected as an input to the Clip tool.
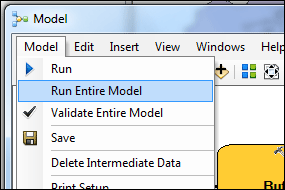
After all the parameters of the tools have been filled in, the model is ready to run. Before you run the model, select the vegtype_c variable, right-click, then click the Add To Display option. Setting this option ensures that when the model is run from ModelBuilder, the output vegtype_c will be added to the display in ArcMap for quick viewing of the results. From the ModelBuilder menu, click Model > Run Entire Model.
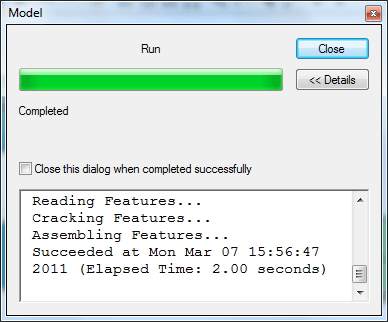
The model runs and the output is added to the display. (Click Close when the process is completed)
After the model has finished running, both the tools (the yellow rectangles) and output variables (the green ovals) show a drop shadow around them indicating that these tools have been run.
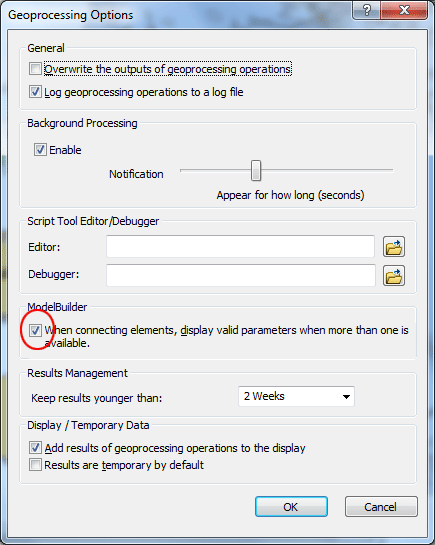
You can run the model on different roads (such as PlanB or PlanC feature classes). First select Geoprocessing > Geoprocessing Options. Please make sure that the check box next to When connecting elements, display valid parameters when more than one is available is checked. Click OK.
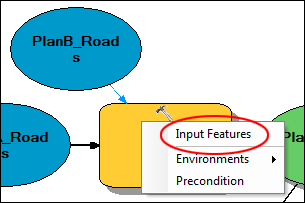
Click the Catalog window, choose the PlanB_Roads feature class and drag it into the ModelBuilder, place it near the top of the Buffer tool. Click the Connect button
This connects the PlanB_Roads variable to Buffer and automatically disconnects the PlanA_Roads variable that was previously connected to the tool. Double-click Buffer and choose the correct distance field from the PlanB_Roads feature class. Also name the output feature class PlanB_Roads_b. Run the model with Model > Run Entire Model. The existing output vegtype_c layer (from the previous run with PlanA_Roads) in the ArcMap table of contents is updated with the results from PlanB_Roads.
Saving a modelYou may want to re-arrange your model a bit better, you can click Auto Layout button
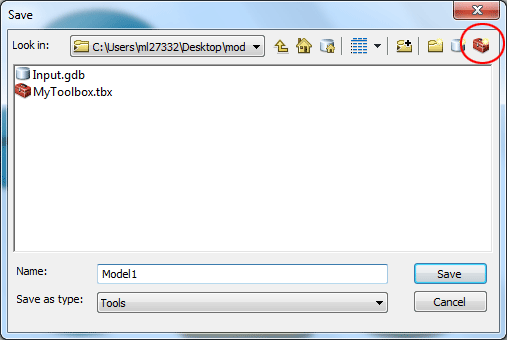
Saving your model is the last step for this tutorial. Click the Save tool A model can only be saved in a toolbox. Click the New Toolbox icon on the navigation window.
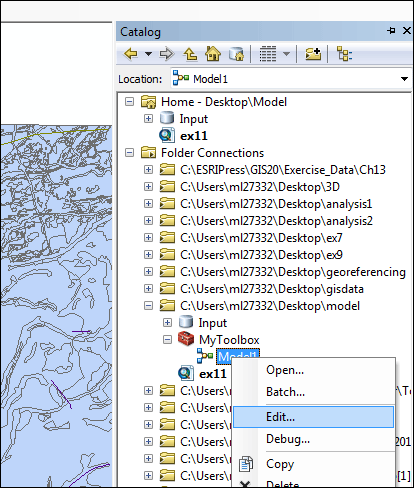
A toolbox with a default name is added in the workspace. You can change the name to MyToolbox.tbx. Double-click MyToolbox.tbx. Click Save to save the model with the name Model1. You can now close your model. If you want to re-open it. Go to Catalog window, then navigate to MyToolbox, then rght-click Model1, then choose Edit.
The deliverable: No assignment is due. prepared by Ming-Chun Lee, 03/24/2014
|
|