HomeExercises |
 |
ARCH4050 / ARCH6050 / MUDD6050 Tutorial 7 - Defining Neighborhood / Center Objectives:
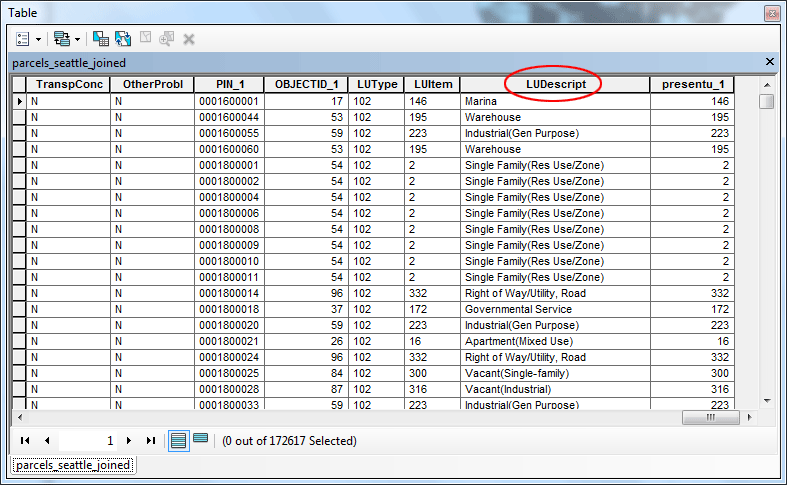
Background:In this tutorial, you will make selections of parcels that will allow you to define "neighborhood centers," which can be thought of as clusters of thematically related parcels that are within a certain distance of each other. For example, many neighborhoods contain shopping districts that are comprised of shops, restaurants, pubs, and grocery stores. This tutorial, which can be also seen as a case study of a vector-based GIS analysis, serves to show the power of a few fairly simple GIS analytical routines for understanding urban issues. SetupCreate a new directory on your desktop, name it analysis1. Click here to download a zip file, which contains a dataset for this tutorial. Save this in your analysis1 directory, then when the download is complete, extract the file there; you will now have a shapefile in that directory with the name parcels_seattle_joined. Open ArcMap. Click File > Add Data, select parcels_seattle_joined, and add it to the Table of Contents in your ArcMap file. View the new layer and its attribute table to verify that everything came out OK. You want to make sure that the attribute table contains the LUDescript field and that all parcels display on the map.
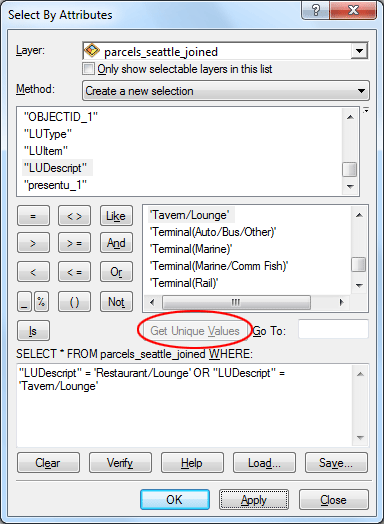
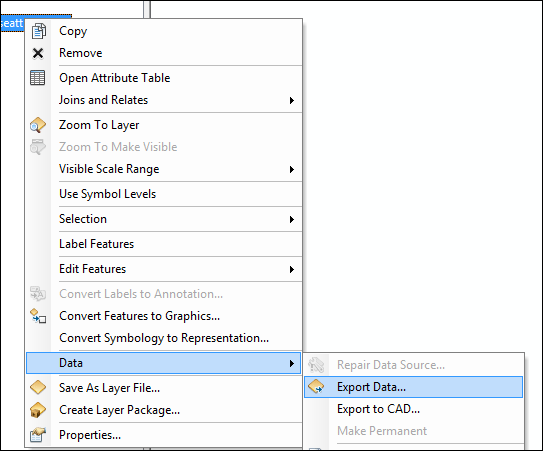
Select parcels based on logical criteriaOur interest in this exercise will be in places where people eat or drink outside the home. Look at the attribute table for parcels_seattle_joined to see what values represent restaurants and taverns or pubs. You should see the values "Restaurant/Lounge," and "Tavern/Lounge." Go to the menu Selection > Select by Attributes, double-click on "LUDescript" in the list of attributes, click on Get Unique Values, and proceed to enter the query string as shown in the figure below. Click Apply. Then click OK. Again, the query string should look like this:
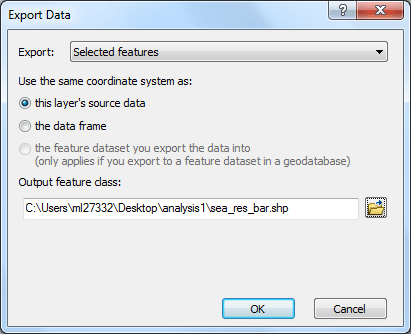
Right-click on parcels_seattle_joined, in the menu it appears, select Data > Export Data..., and export the selected polygons as a new shapefile, name the output feature class sea_res_bar.shp,
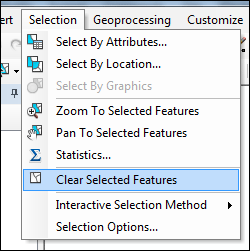
When being asked, click Yes to add exported features in the map. Before we move on, clear all selected features by going into the menu Selection > Clear Selected Features.
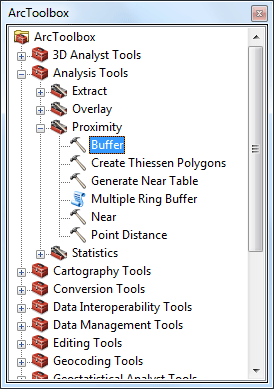
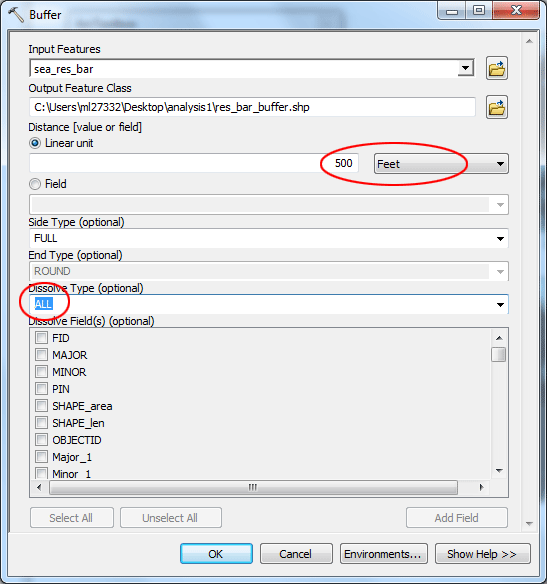
Create buffers around parcels In order to determine if some restaurants and pubs are within a pre-determined proximity of each other, we will use the buffering technique. For this exercise we will use a distance of 500 ft, about the length of a typical city block in Seattle. Enable ArcToolbox while in ArcMap and open the tool Analysis Tools > Proximity > Buffer.
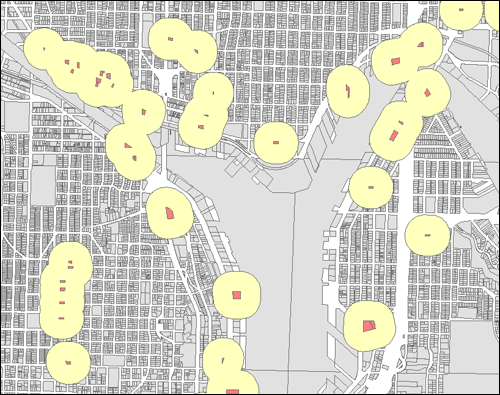
Select sea_res_bar as your input feature. Save the data set as res_bar_buffer in your directory analysis1. Specify a linear buffer distance of 500 ft, and make sure to select ALL as the Dissolve Type to make sure Side Type set to FULL. Click OK and the process will progress The newly created layer is now added on the top of list in the table of contents. Let us move sea_res_bar layer up above res_bar_buffer layer. Now you will see that buffers have been created around each restaurant and pub, and the buffer polygons have been dissolved.
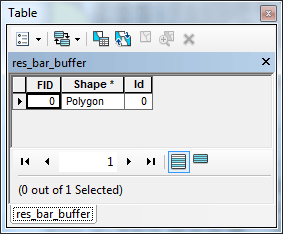
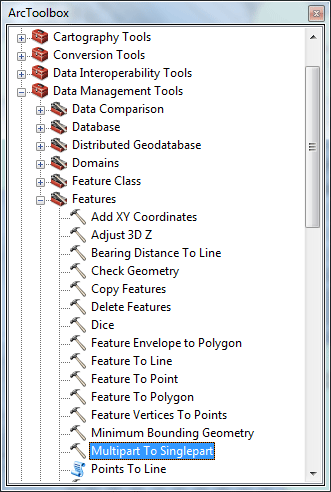
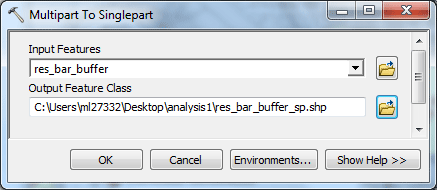
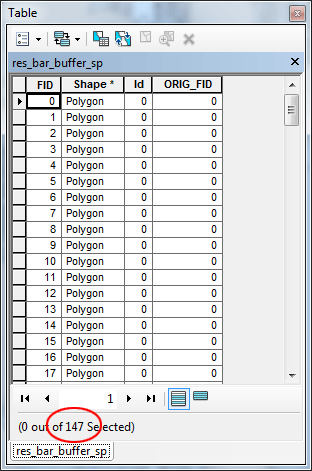
One of the problems with this method is that now rather than having a series of buffer polygons, there is only a single polygon, with multiple shapes. To verify this, open the attribute table: To "explode" this single polygon into individual polygons, use the ArcToolbox tool Data Management Tools > Features > Multipart to Singlepart. In the dialog, set the Input Features to res_bar_buffer, name the output Feature Class res_bar_buffer_sp, click OK
The new layer should be in the table of contents, open its attribute table. Now you will see that there are 147 individual buffers.
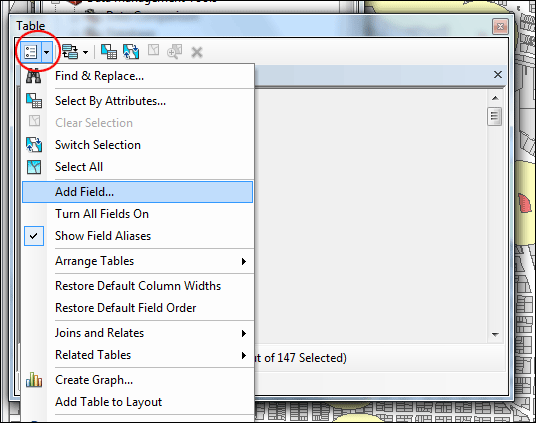
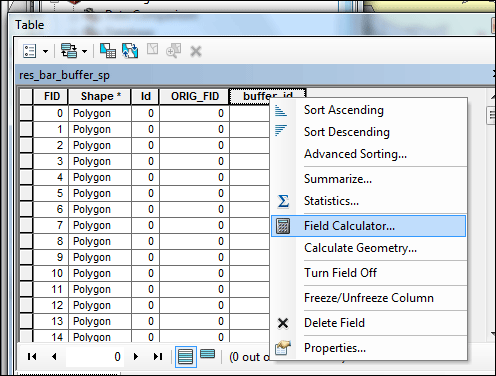
Now you can remove the original buffer layer to avoid confusion. Right-click res_bar_buffer and choose Remove from the menu. Once again, in the table of contents, move sea_res_bar layer up above res_bar_buffer_sp layer. In order to track these buffers through the process, it will be necessary to have a field that uniquely identifies polygons. Right-click res_bar_buffer_sp layer, open its attribute table, click Table Options dropdown menu, then click Add Field...
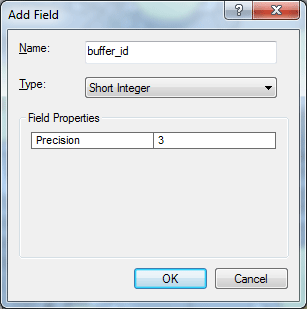
In the dialog it appears, name the new field buffer_id (short integer, precision = 3).
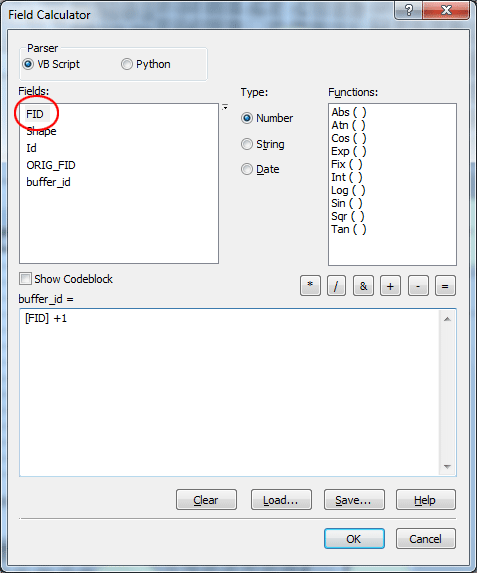
Calculate the buffer_id field to be equal to the FID field plus 1. Right-click the header of buffer_id field, choose Field Calculator...
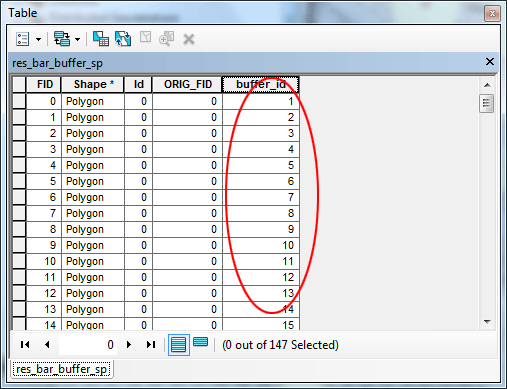
In the dialog, double-click FID, then set the query as shown below: [FID] + 1, click OK
Now the identifiers have been set:
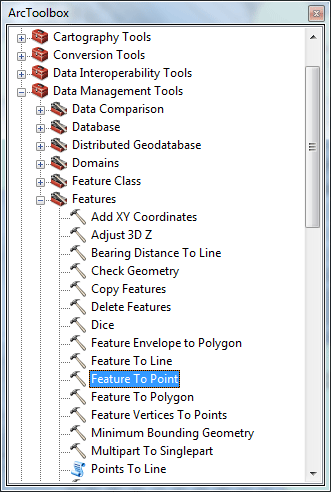
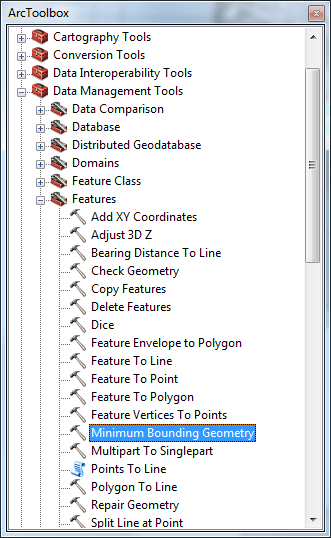
Count parcels within combined buffersTo tally the parcels within each buffer it is necessary to assigns the buffer ID number to each parcel. In order for this to be done, each parcel must be coded for the buffer in which it lies. To do this it is necessary to convert the polygon centroids to points, because the GIS can only determine if points are inside polygons. Open ArcToolbox, double-click Data Management Tools > Features > Feature to Point.
In the dialog, set the input features to sea_res_bar layer. Name the output feature class sea_res_bar_pts.shp. Check Inside to force the points to be created inside the parcel boundaries.
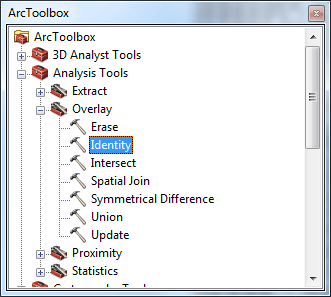
The points represent restaurant and pub parcel centroids, but they are not coded for the buffer in which they lie. To encode the parcel points with the buffer ID, use the tool Analysis Tools > Overlay > Identity
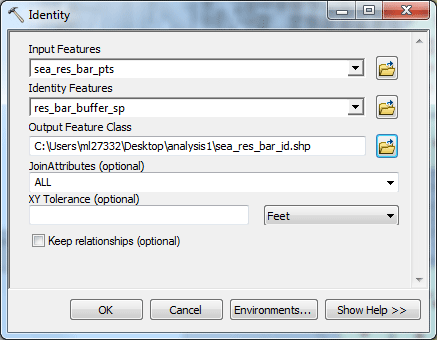
In the dialog, set the input features to sea_res_bar_pts and the overlay features to the buffers res_bar_buffer_sp. Name the output feature class sea_res_bar_id.shp.
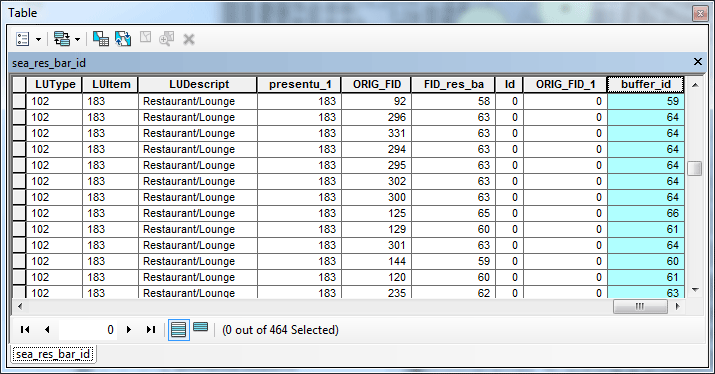
The points in a new layer will appear the same in the map display, but the attribute table now contains values for the field buffer_id, which is the unique identifier for buffers. Open the attribute table for this new layer. Scroll all the way right to see these.
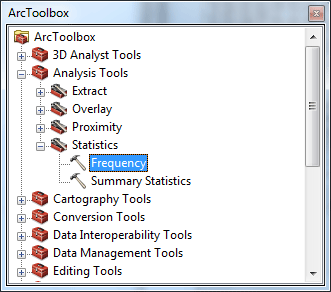
The last step for tallying the restaurant and pub land uses within each buffer is to run a frequency function. in the ArcToolbox, Use the tool Analysis Tools > Statistics > Frequency.
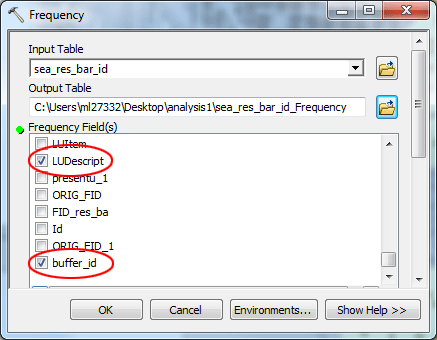
In the dialog, set the input table to sea_res_bar_id. Name the output table sea_res_bar_id_Frequency. Use the Frequency Fields: LUDescript and buffer_id. This will tally up all the occurrences of combinations of land use and buffer IDs.
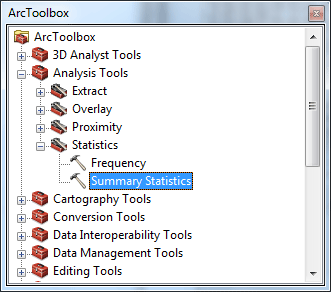
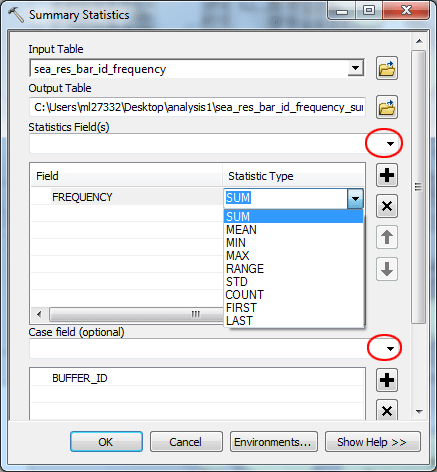
Examine land uses within buffersIn order for a group of parcels to be considered an eating/drinking neighborhood center, it should contain at least one restaurant and at least one pub. Let's make another constraint that a neighborhood center should contain at least six parcels of either of these land uses. To determine which of the neighborhood centers meet these criteria, it is necessary to run a data summary. Use the tool Analysis Tools > Statistics > Summary Statistics.
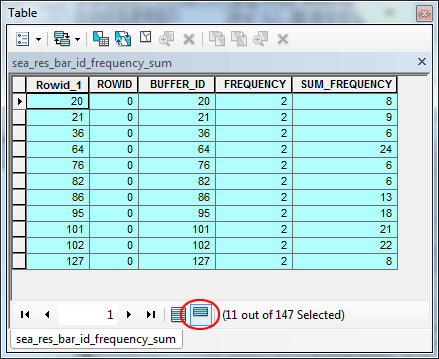
Set the input table as sea_res_bar_id_Frequency. Name the output table sea_res_bar_id_Frequency_sum. Click the dropdown menu for the Statistics Field then select FREQUENCY, and click the field Statistic Type then select SUM from the dropdown menu. Select buffer_id as the Case field.
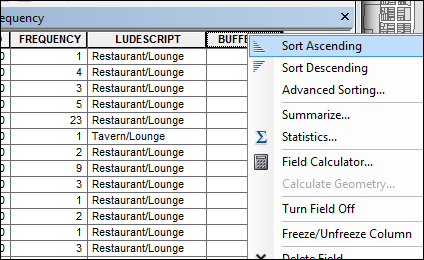
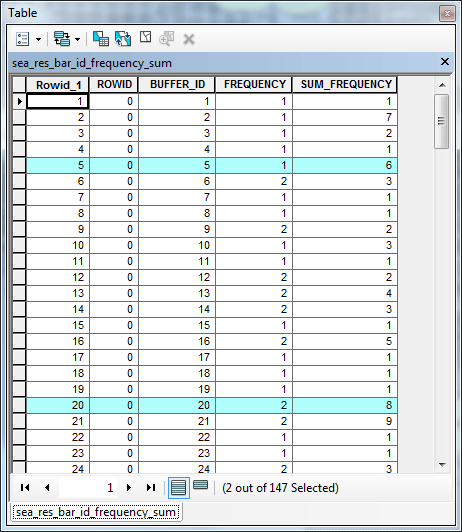
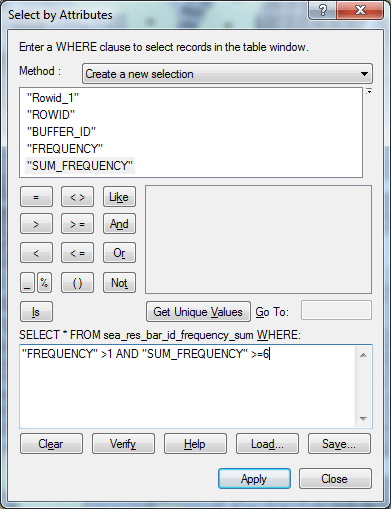
This new table shows the frequency of different types of land uses as well as the sum of parcels with the two land uses of interest for each buffer. Using the table below as an example (yours will probably be different), buffer 5 has 6 eating/drinking parcels (SUM_FREQUENCY = 6), but only one type, either restaurants or pubs. By contrast, buffer 20 has both types of establishments (FREQUENCY = 2) and a total of 8 eating/drinking parcels. We will consider those parcel records with FREQUENCY >1 and SUM_FREQUE >= 6 as eating/drinking neighborhood centers.
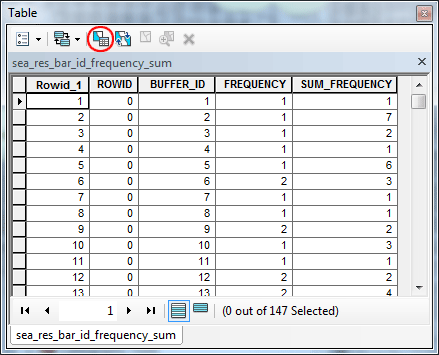
Then set the selection query as shown below: click Apply to make the selection.
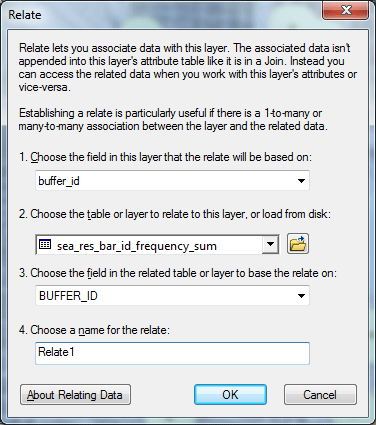
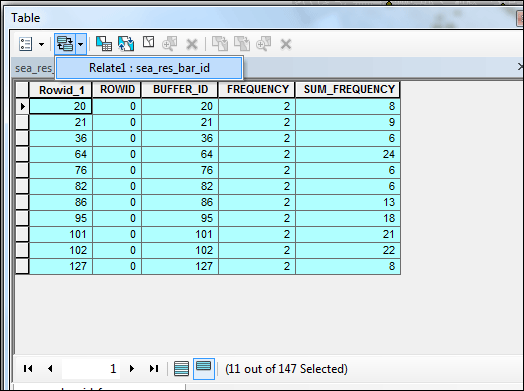
Back in the table, click Show selected records, you will see that there are 11 buffers that can be considered neighborhood centers under the current criteria. Create convex hulls from selected parcel centroidsNow that we have a list of parcels that can be considered eating/drinking neighborhood centers, the next step will be to create convex hulls that represent the neighborhood centers. First we will have to select parcel centroids matching the criteria we specified above. One efficient and foolproof method is to use a database relate. A relate will cause selected records in one table to automatically select records in a related table. Right-click the sea_res_bar_id layer and select Joins and Relates > Relate. Relate this table to the final summary table we created sea_res_bar_id_Frequency_sum (the one with the 11 records matching our criteria). Now update the relate. Right-click on the sea_res_bar_id_Frequency_sum table (note: if you don't see it right away in your Table of Contents, make sure to click the Source tab at the top), select Open, then in the table, make sure only those 11 records are highlighted, (if not you will have to repeat the select by attributes process again). Then click Related Tables icon and choose the Relate1: entry.
This will select point records from sea_res_bar_id that have the same values as the selected records in the summary table. These points represent parcels that are:
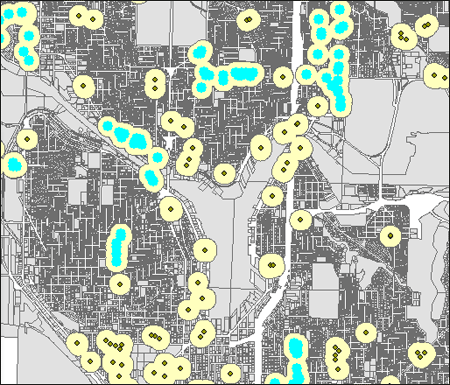
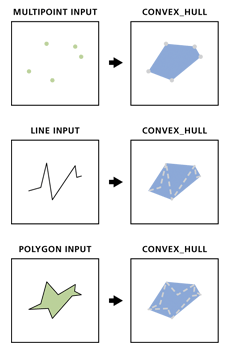
The last step is to create the convex hulls. The figures below should give you an idea what convex hulls are:
In ArcToolbox, select Data Management Tools > Features > Minimum Bounding Geometry,
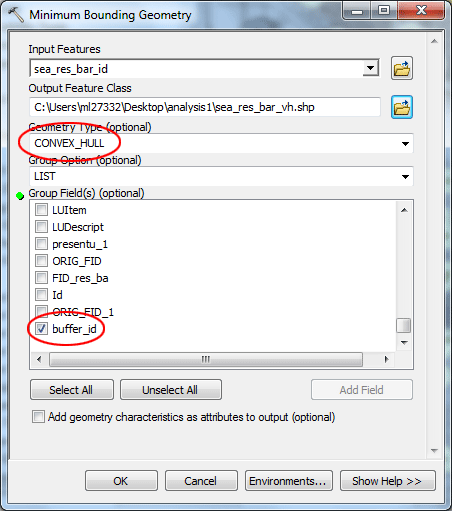
In the dialog, select sea_res_bar_id as the input features. Name the output feature class sea_res_bar_vh.shp. Select CONVEX_HULL as Geometry Type. Then select LIST as Group Option. Check the field buffer_id. Then click OK.
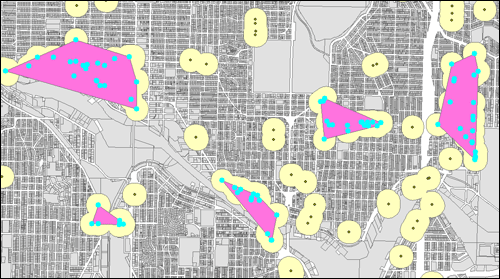
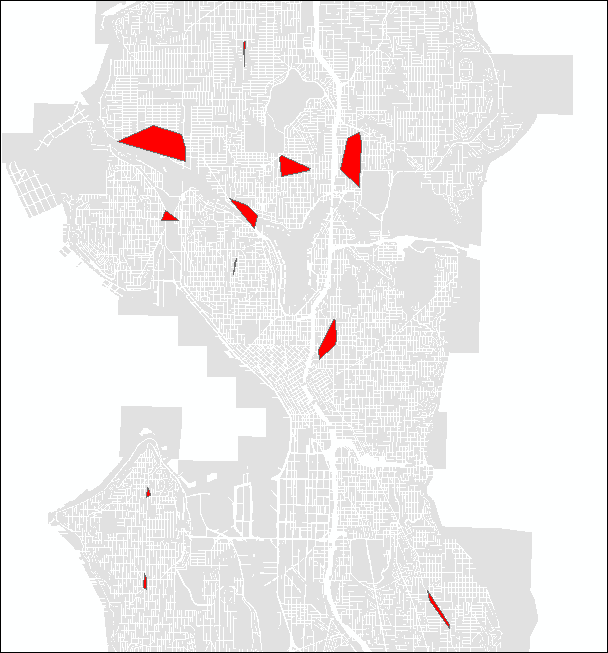
After the process is complete, the convex hull layer will be automatically added to the map display.
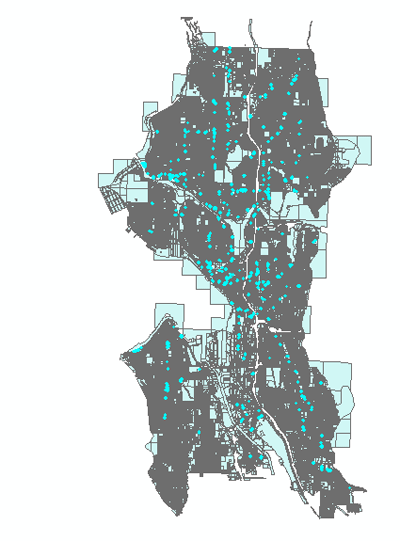
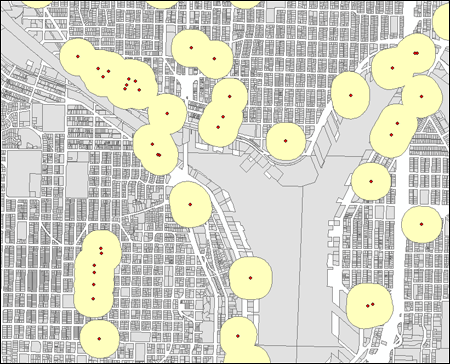
The neighborhood centers identified by this process are in Ballard, Greenwood, Wallingford, the University District, just north of the University Village, Capitol Hill, West Seattle (California/Admiral), Georgetown, and Columbia City.
Do you think the criteria we used are reasonable? How would you define a neighborhood center differently? What would be the possible application(s) of these tools or processes to your project? The deliverable:
Reference: This tutorial was originally designed by Phil Hurvitz in 2007. Phil is currently a research assistant professor at the University of Washington. The tutorial has been modified to better work with the new ArcGIS 10 work environment. prepared by Ming-Chun Lee, 02/21/2016
|